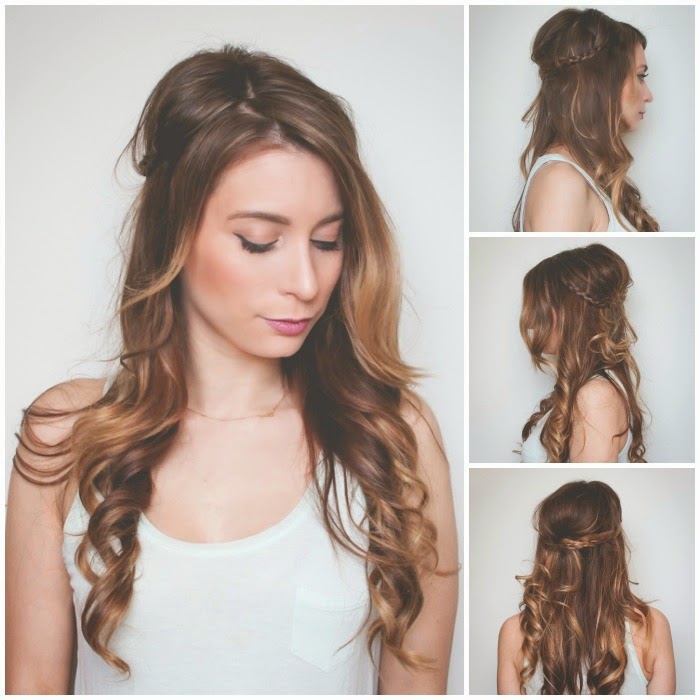
You can see a running theme in my hair tutorials - easy, simple and casual. I have said it before, that I am barely a hair person, but am always after super simple styles that make it seem as though much more effort went into the look than it really did. The braided half crown is one of my go-to styles when I'm after a romantic, bohemian look but don't have a lot of time to fiddle with my hair. Read on for step-by-step instructions on how to achieve this pretty braided half crown.
Once you have your desired volume, it's time to start braiding. Grab a piece of hair about once inch wide, about a quarter of the way into your head. The braided half crown looks more bohemian and casual when you leave a sizeable amount of bangs loose. Start braiding that piece of hair, all the way down until you reach the ends. Once you complete the braid, secure the ends in place with either a small elastic or a bobby pin. Leave that braid for now - we need to repeat the same step on the other side of your head.
Repeat the same step on the other side of your head - grabbing a one inch section of hair and braiding all the way down to the ends. Again, you want to leave a good amount of bangs loose, so start your braid one quarter of the way down your head.
Give your hair another extra bit of volume, right at the crown. This will not only add to the aesthetic of the braided half crown, but also help the braids themselves stay in place when we start pinning.
Take each braid, and pin it securely to the back of your head using bobby pins. You will want to pin one braid on top of the other, about halfway down the back of your head.
 |
| Bra Shot - Whoops! |
Done - you now have a braided half crown that perfectly compliments any flowy maxi dress or romantic chiffon you plan to wear this summer.
Will you try out this simple summer hair style?
-Joëlle


Love this! Will be practicing this tonight at home (I'm also not a hair person...). Cheers! :)
ReplyDeleteI'm sure it will turn out great!
DeleteTrying fun hairstyles like this is something I miss most about long hair...though I must say that the 5 minute styling requirements of my bob are pretty sweet early in the morning :)
ReplyDeleteI have to fight urges to cut off all my hair every time I wash it - it takes hours to dry, and then the styling on top of it! I suffer from bob envy :)
DeleteI love this hairstyle! It's so simple yet cute. I'm adding it to my list of potential prom hairstyles but I don't think it would look as good on me as it does on you aha.
ReplyDeleteHow long do you think it took you to do? :)
Hi Gen - I say go for it, it's such a simple and unique hairstyle for prom! I wish I could have done something like this instead of the huge, elaborate up-do that I got done ;)
DeleteFrom start to finish, this style took maybe about 10 minutes - but I like the messy look, so it may take a little longer if you wanted something cleaner. Have a great time!
beautiful! this style is making me miss my long hair :(
ReplyDelete-Andréa
VA DARLING